
Life Style
8 min read
How to Fix Leaks and Protect Your Home with DIY Waterproofing Solutions
October 22 , 2026
By Mason Brooks
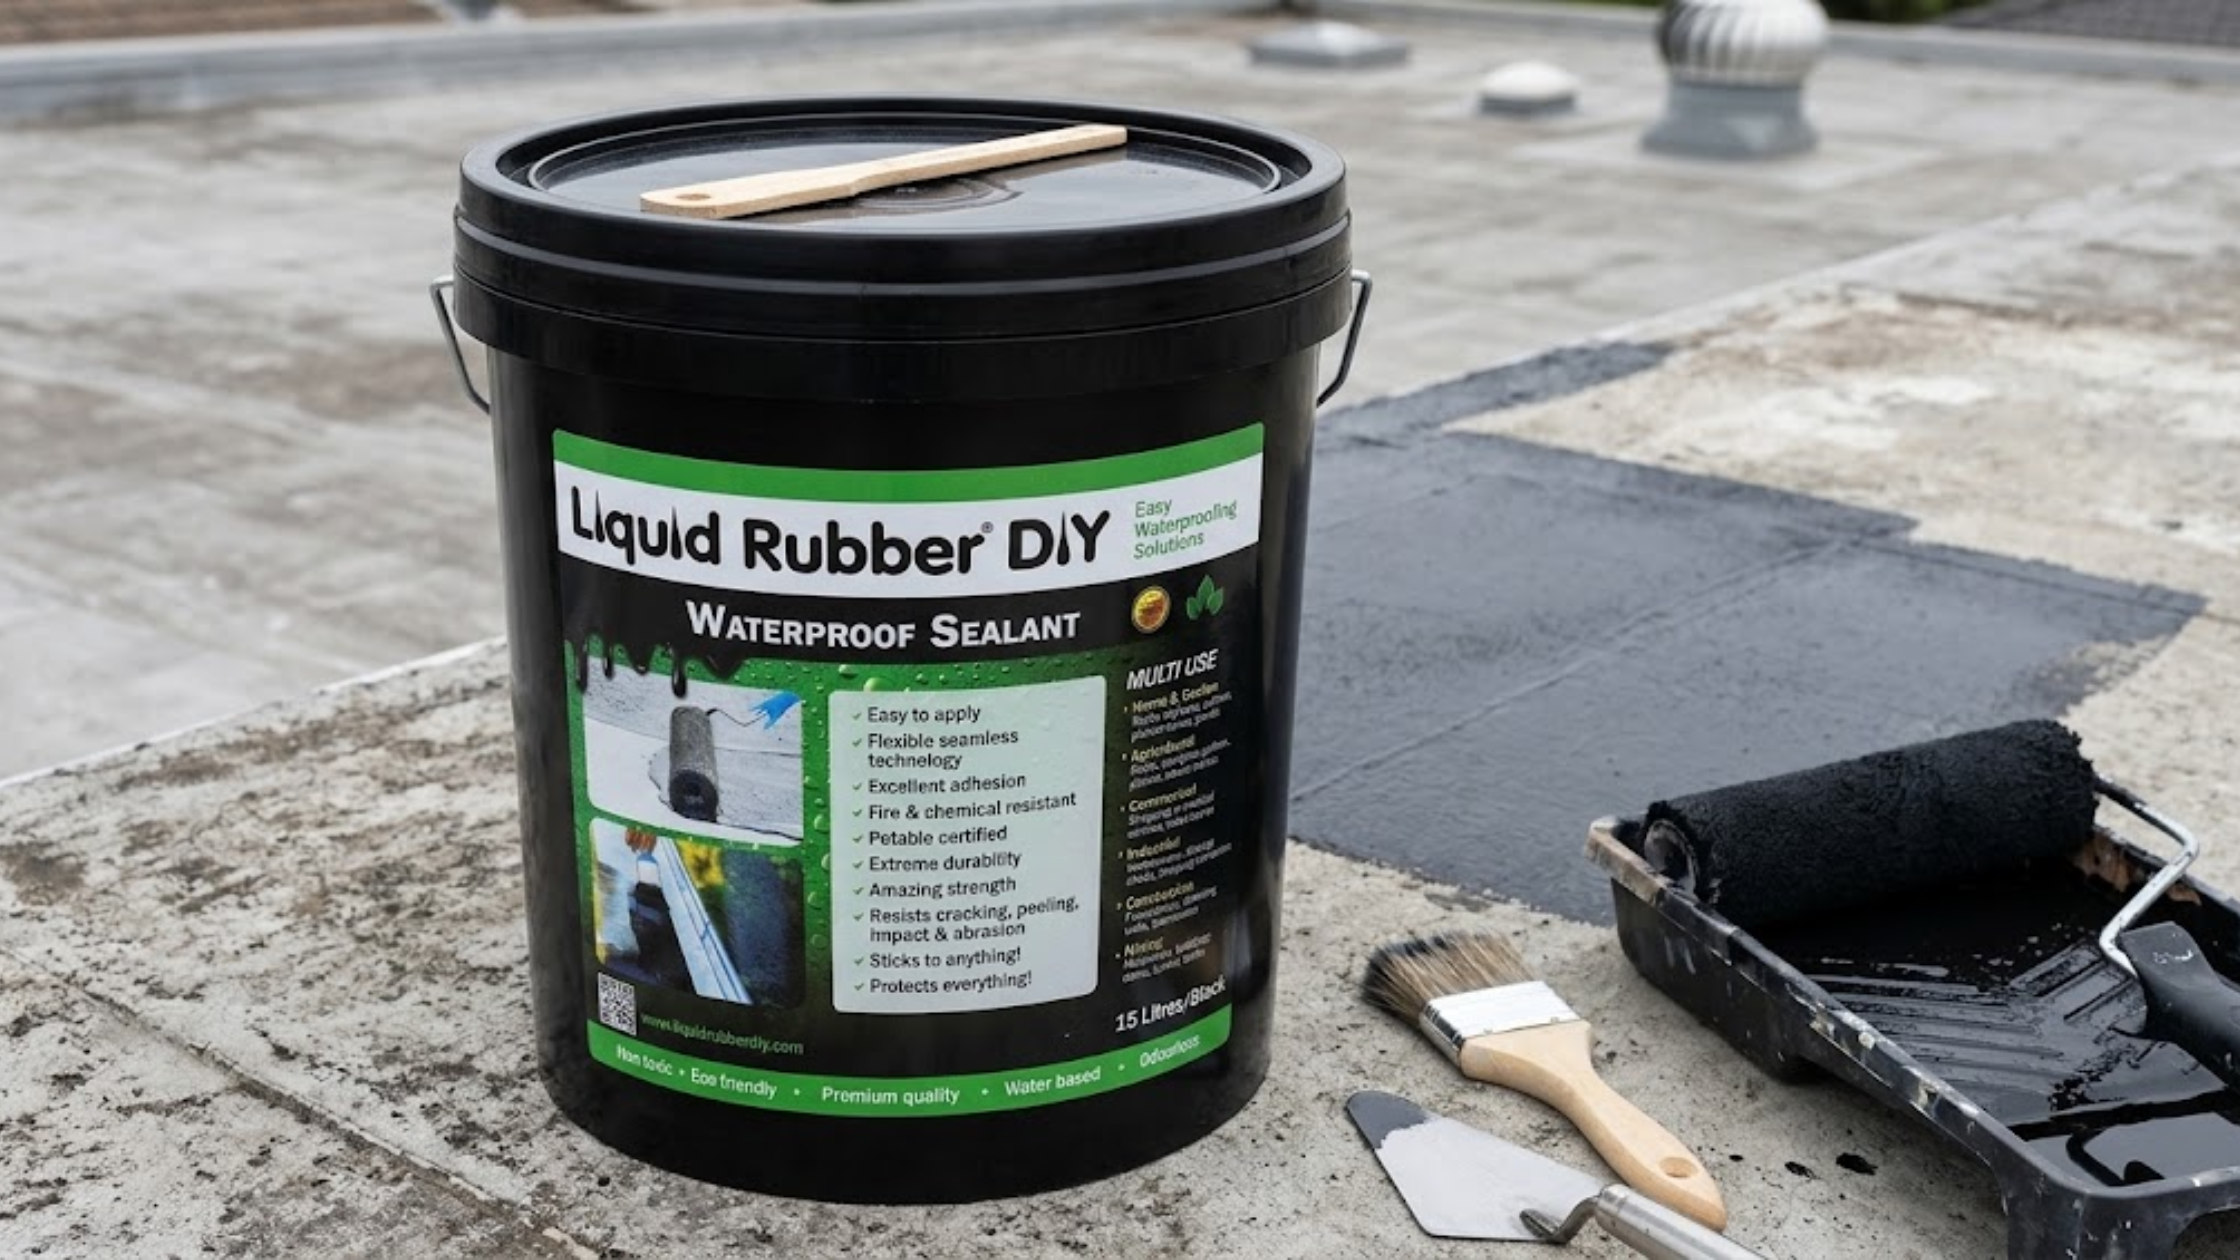
Learn how to fix minor leaks and protect your home with DIY waterproofing solutions. Discover surface preparation tips, suitable coatings, and maintenance advice with Liquid Rubber Diy AU.
Water leaks can turn a comfortable home into a frustrating maintenance project. For example, roof leaks, damp walls, and cracked concrete can cause bigger problems over time. Moreover, moisture can damage paint, weaken materials, and encourage mould growth. Fortunately, you can protect your property without always paying for expensive repairs. With proper preparation, suitable materials, and a practical approach, you can tackle many minor waterproofing projects yourself. Additionally, Liquid Rubber Diy AU offers homeowners a convenient way to explore waterproofing solutions for sealing vulnerable surfaces and reducing water penetration. However, successful waterproofing requires more than simply applying a coating. First, identify the moisture source and prepare the surface properly. Next, choose a suitable product for your specific waterproofing needs. Finally, follow the correct application steps to achieve reliable results. This guide explains how to address common waterproofing problems and protect your property more effectively.
Understand the Common Causes of Water Leaks
Before choosing a waterproofing solution, identify where moisture enters your property. Since different surfaces require different repair methods, assess each affected area carefully. Therefore, understanding the underlying problem helps you avoid wasting time and money.
Roof Leaks and Damaged Surfaces
Roofs constantly face rain, sunlight, and changing temperatures. Over time, these conditions can damage protective layers and cause small cracks. As a result, water can seep through seams, joints, or damaged roofing materials. Flat roofs also face additional challenges because standing water stresses vulnerable areas. Therefore, regular inspections help you identify problems before they require expensive repairs.
Cracks in Concrete and Masonry
Concrete patios, balconies, foundations, and retaining walls can crack as materials expand, contract, or settle. Consequently, water can enter these openings and gradually worsen existing damage. Furthermore, poor drainage can keep these surfaces wet for extended periods. Therefore, improve drainage and apply suitable waterproofing to help protect these structures.
Moisture Around Windows and Outdoor Areas
Window frames, door thresholds, and exterior joints can also let water enter your home. Moreover, damaged sealants often create small gaps that homeowners overlook. Similarly, balconies and outdoor structures also need proper waterproofing protection. Even minor gaps can cause persistent dampness when rain repeatedly hits exposed surfaces.
Why Traditional Waterproofing Methods Sometimes Fail
Many homeowners initially use ordinary paint, temporary patches, or inexpensive sealants. However, these options may not address the underlying moisture problem. For example, ordinary exterior paint may lack the flexibility or waterproof barrier certain surfaces require. Likewise, patches applied over dirt or loose material may lose adhesion quickly. Additionally, homeowners often overlook existing damage. Applying waterproof coatings over unstable concrete, active leaks, or deteriorating materials rarely delivers reliable results. Meanwhile, temperature changes can affect certain coatings. Some materials become brittle, while others need specific application conditions to cure properly. Therefore, choose a waterproofing system that suits your surface and exposure conditions. Finally, follow the manufacturer's instructions and confirm product compatibility before starting.
Practical DIY Waterproofing Solutions That Work
You can improve waterproofing results by following a systematic process. Additionally, these practical steps help you avoid common mistakes and use your materials more effectively.
1. Inspect the Surface Carefully
Start by inspecting the affected area during dry weather. Look for cracks, peeling paint, damaged joints, loose materials, and persistent moisture. Next, check nearby gutters and downpipes for blockages or leaks. Also, verify that water drains away from the building properly. If you cannot identify the source, investigate further before applying any coating. Persistent dampness may result from plumbing leaks, rising damp, or structural defects.
2. Clean and Prepare the Area
Surface preparation plays a crucial role in waterproofing performance. First, remove dirt, dust, loose paint, grease, and deteriorating materials before applying waterproofing products. Next, use suitable cleaning tools to avoid damaging the underlying surface. Then, let the area dry according to the product manufacturer's instructions. Additionally, repair cracks and damaged joints with compatible materials when necessary. However, consult a professional before proceeding with moving joints or significant structural cracks.
3. Select a Suitable Waterproofing Product
Different projects require different waterproofing materials. For example, cementitious coatings suit certain masonry applications, while membranes protect other exposed surfaces. For flexible protection, Liquid Rubber Waterproof Coating may offer a practical solution. However, ensure its specifications match your project requirements. Certain formulations create a continuous barrier that helps prevent water penetration. Nevertheless, no single coating suits every surface. Therefore, check the product’s compatibility with your substrate, expected water exposure, and environmental conditions.
4. Apply the Coating Correctly
First, follow the manufacturer's instructions for application temperature, surface preparation, coverage, and drying times. Additionally, use suitable brushes, rollers, or other recommended equipment. Next, apply the specified number of coats and follow the required intervals between applications. Also, pay particular attention to corners, seams, joints, and other vulnerable areas. Meanwhile, allow each previous layer to reach the recommended stage before applying additional coats. Finally, protect the fresh coating from rain and contamination during curing.
5. Check Drainage and Maintain the Surface
Waterproofing works best when you also manage water movement around your property. Therefore, clean gutters regularly and keep drainage outlets free from debris. Additionally, inspect previously repaired areas after severe weather. Address minor defects early instead of waiting for visible interior damage. These habits help you identify developing problems and maintain your waterproofing system’s performance.
Why Liquid Rubber Products Can Simplify DIY Projects
Choosing suitable materials can simplify home maintenance. Moreover, many homeowners prefer solutions that offer easy application and practical protection. Depending on their formulation, Liquid Rubber Products create flexible, seamless coatings across compatible surfaces. This flexibility may accommodate minor surface movement without immediately compromising the protective layer. Additionally, liquid-applied coatings reach irregular areas that challenge some sheet materials during installation. Consequently, these coatings may suit selected roofing, masonry, and exterior maintenance projects. Homeowners exploring DIY Waterproofing Solutions can compare Liquid Rubber Diy AU products for their projects. However, they should match each formulation to their surfaces and waterproofing requirements. Before purchasing, review the technical data sheet, coverage rate, curing requirements, and application instructions. Additionally, check whether the product requires a primer or reinforcement material.
Benefits of Choosing a Quality Waterproofing Solution
A suitable waterproofing system offers several practical benefits. However, proper product selection, thorough preparation, and correct installation determine the results.
Better Protection Against Moisture
A properly applied coating helps stop water from penetrating compatible surfaces. Consequently, this protection may reduce moisture-related damage and preserve treated materials. However, waterproofing cannot fix every underlying structural or drainage problem. Therefore, address these issues separately to achieve better protection.
More Manageable Home Maintenance
DIY projects can reduce labour costs when your skills match the task. Additionally, choose products that allow homeowners to apply them safely. Simple application methods can also help you complete smaller repairs efficiently. However, professional installation may offer better value for larger or complicated projects. Moreover, experienced professionals can reduce the risk of expensive mistakes.
Potential Long-Term Savings
Preventing water penetration helps protect paint, flooring, and other building materials from damage. Additionally, early repairs can stop minor defects from becoming more expensive maintenance issues. However, evaluate the product’s coverage, durability, preparation requirements, and maintenance needs. Avoid focusing solely on its purchase price. When evaluating Liquid Rubber Diy AU, consider the total project cost and expected performance. Ultimately, this approach helps you choose a solution based on overall value rather than price alone.
When Should You Call a Waterproofing Professional?
DIY repairs work best when you understand a minor, accessible problem. However, some situations require assessment from a qualified specialist. For example, contact a professional if you notice extensive foundation cracks, recurring water intrusion, or significant structural movement. Also, seek expert advice when persistent dampness has no obvious cause. Additionally, consult a specialist before waterproofing areas exposed to constant water pressure. You should also seek guidance when projects require specialised building compliance. Bathrooms, swimming pools, and below-ground structures may need systems designed for their specific conditions. Never cover an unresolved leak just to hide visible damage. Instead, identify the underlying cause and choose an appropriate repair method.
Conclusion: Protect Your Home with Smarter Waterproofing Choices
Waterproofing does not need to become an overwhelming home improvement project. First, identify leaks early, prepare surfaces properly, and improve drainage to prevent avoidable maintenance problems. Next, select the right coating for your intended application. Liquid Rubber Waterproof Coating may suit projects requiring a flexible, continuous moisture barrier. Additionally, explore compatible Liquid Rubber Products and compare their specifications before deciding. Consider Liquid Rubber Diy AU when researching materials for suitable DIY repairs. Ultimately, informed product selection and careful application deliver better results than quick fixes. First, identify the problem’s source and choose an appropriate solution. Then, maintain treated surfaces regularly to preserve their condition. These steps help protect your property and build confidence in future waterproofing projects.
live smarter
Shop smarter, live better, and stay ahead of the trends with our reliable recommendations!


trending
Sport
8 min read
How to Choose Boxing and MMA Gear for Safer, More Effective Training
Life Style
7 min read
How to Keep Your Car Interior Clean with the Right Floor Mats
Technology
6 min read
How to Choose Smart Tech for Everyday Life
Food
5 min read
How to Brew Coffee Like a Barista at Home Without Overcomplicating It
Health
5 min read
Purified Water vs Spring Water: Which One Is Actually Better for Your Health?
Travel
6 min read